Every assembly that uses a screw faces the same quiet decision: should the thread live in the parent material itself, cut directly as a tapped hole, or should it live in a separate threaded insert that is fitted into the parent material? The two options look interchangeable on a drawing — both give you a thread to screw into — but they behave very differently in service, and choosing the wrong one is usually discovered only when a thread strips, a screw will not hold, or a joint that was meant to be serviced cannot be opened again. The choice is worth making deliberately, before the drawing is frozen, because it changes the drawing, the RFQ, and the assembly.
What a tapped hole is, and when it is the right call
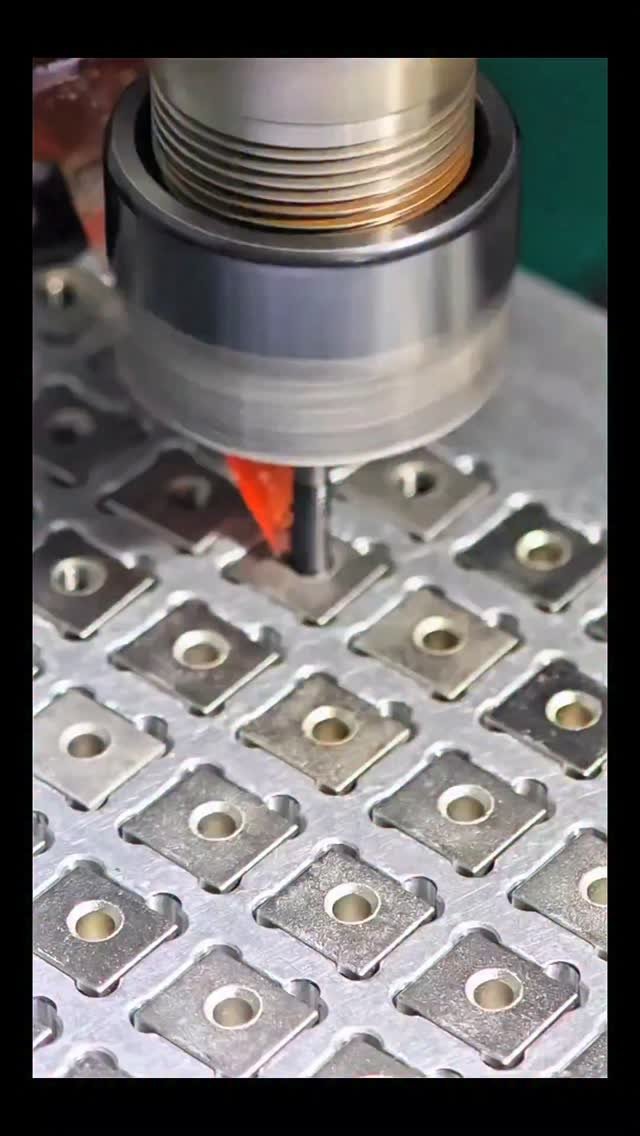
A tapped hole is a thread cut directly into the parent material. It is the simplest option: no extra part, no extra installation step, and nothing to buy beyond the tapping itself. It is the right call when the parent material can hold a thread on its own — a metal housing, a thick plate, or a machined part with enough material around the hole — and when the screw will not be removed often. A tapped hole in a suitable material, with enough thread engagement, is strong, cheap, and easy to inspect. The conditions that make it work are worth stating plainly: the parent material must be hard enough to hold the thread, the hole must have enough depth for the engagement the load needs, and the screw must not be tightened and loosened so often that the thread wears. When those three conditions hold, a tapped hole is usually the best answer, and adding an insert would be an unnecessary part.
What a threaded insert is, and when it earns its place
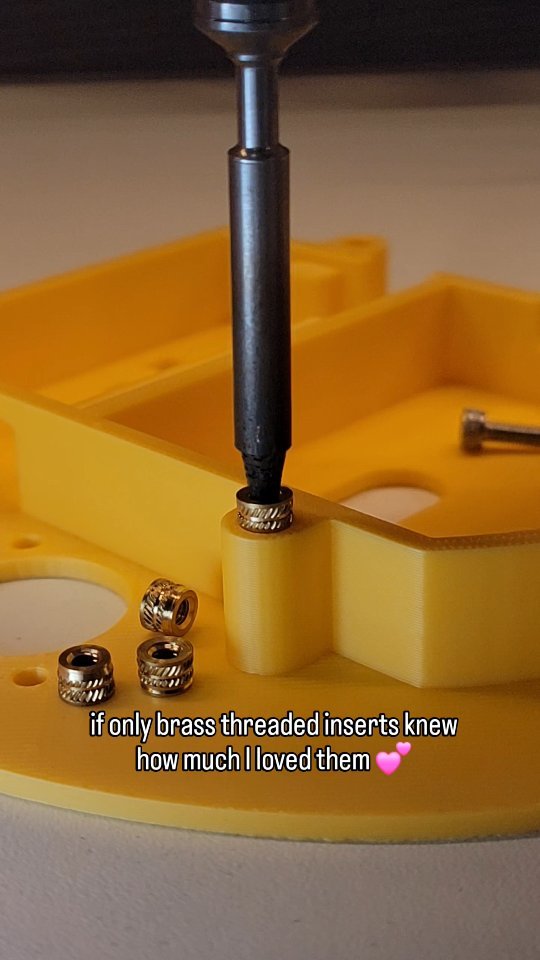
A threaded insert is a separate part — usually brass — that carries the thread and is fitted into the parent material, which on its own cannot hold a thread. It earns its place where the parent material is soft, thin, or unable to carry a thread: a plastic housing, a thin sheet, a soft alloy, or a material that would strip under the screw. It also earns its place where the screw will be removed repeatedly for service, because the insert’s thread survives assembly and disassembly far better than a thread cut into a soft parent material. The insert provides the thread, the parent material provides the housing, and the two must work together. The first question is whether an insert is needed at all; the second is which kind, because inserts hold in different ways — pressed in, screwed in, moulded in, or gripped by a knurled outside — and the outside form matters as much as the inside thread.

The comparison that decides it: material, load, and service
Three questions decide between a tapped hole and an insert, and they should be answered in order. First, the parent material: can it hold a thread, or does it need an insert to carry one? Second, the load: is the joint loaded in tension, shear, or vibration, and how much thread engagement does that load need? A tapped hole in a thin material may not have enough engagement, while an insert can provide a full thread in the same thickness. Third, service: will the screw be removed once, occasionally, or repeatedly? A screw that is tightened once and left alone may be fine in a tapped hole; a screw that is removed for service needs the durable thread an insert provides. Write the answers to those three questions in the RFQ, and the choice usually makes itself. A buyer who can say how often the screw will be removed, and what load it carries, will get a better recommendation than a buyer who only states the screw size.
How the choice changes the drawing
The choice changes what the drawing must show, and a drawing that does not reflect it will be quoted wrong. A tapped hole needs the hole size, the thread, the depth, and whether the hole is blind or through — and a blind tapped hole needs enough depth for the tap to run out, which is a detail buyers often forget. An insert needs more: the insert type, the outside form, the length, the hole that receives it, and the parent material it will sit in. A hole that is too large will not grip the insert; a hole that is too small will crack the parent material or deform the insert. If an insert and a fastener are used together, show them in the same assembly drawing, because the insert thread and the fastener thread must match, the lengths must work together, and the installation must be possible in the assembled product. A drawing that shows the insert and the fastener in the same assembly is more useful than two separate drawings that do not reference each other.
How the choice changes the RFQ and the quote
A tapped hole is quoted as part of the machining: the hole, the thread, and the inspection of both. An insert is quoted as a part plus an operation: the insert itself, the hole preparation, and the installation. That difference matters when comparing quotes, because a quote that includes an insert and one that does not are not quoting the same thing. State the choice in the RFQ, and state what is included: for an insert, the insert type, the hole size and depth, and who installs it and with what tooling. If the insert will be installed by the end user, the installation must be simple and forgiving; if it will be installed in production, it can be more controlled, but it still needs to be specified. A short note in the RFQ — “screw is removed for service, insert required” — changes the recommendation and the price, and it is far cheaper to write that note than to change the design after quoting.
Installation and assembly: the step that decides whether it holds
Installation is part of the specification for an insert, and it is the step most often left out. A pressed insert needs a press, a jig, and a controlled force. A screwed insert needs a driver and a hole that will accept it. A moulded insert needs to be placed before the parent material is formed. If the installation method is not stated, the insert may be installed in a way that damages it or the parent material, and the joint will fail in service rather than in the factory. For a tapped hole, the assembly question is different: is the thread protected during handling, and is the screw started straight so it does not cross-thread? Both options need the assembly described in the RFQ — who installs it, what tooling is available, and whether the work is done in the factory or in the field. A joint that vibrates needs special attention in either case, because vibration loosens screws and works inserts, and the choice of thread, insert, and screw must account for it.
Switching from one to the other: what it costs to change your mind
Changing from a tapped hole to an insert, or the reverse, after the drawing is frozen is rarely a small change. It changes the hole size, the material around the hole, the installation step, and often the assembly sequence. A parent material that was chosen because it could hold a tapped thread may be the wrong material once an insert is needed, and a housing designed around an insert may not have enough material for a tapped hole. That is why the decision belongs early, before the drawing is frozen and before the quote. If a change is needed later, say so plainly in the RFQ and ask for a recommendation — an engineer who sees the whole application can advise on the change, but only if the application, the load, and the service life are described.
Common pitfalls and how to avoid them
The most common pitfall is tapping a thread into a parent material that cannot hold it, and discovering the failure only when the joint strips in service. The second is specifying only the thread size for an insert and leaving the hole, the insert type, and the installation to guesswork. The third is a blind tapped hole without enough depth for the tap to run out, so the thread is incomplete where the screw needs it. The fourth is an insert hole that is too large or too small, found only when the joint fails. The fifth is a joint that vibrates, specified as if the load were static, in either option. The sixth is comparing a quote with an insert against a quote without one as if they were the same thing. Each of these is avoided by answering the three questions — material, load, service — before the drawing is frozen.
Buyer checklist
- The parent material is named, and whether it can hold a thread on its own is stated.
- The load is described: tension, shear, vibration, or a combination.
- How often the screw will be removed is stated: once, occasionally, or repeatedly for service.
- For a tapped hole, the hole size, thread, depth, and blind or through condition are stated.
- For an insert, the insert type, outside form, length, hole size and depth, and parent material are stated.
- The mating screw size, length, and thread engagement are stated for either option.
- Who installs the insert, and with what tooling, is stated; for a tapped hole, the assembly method is stated.
- If an insert and a fastener are used together, they are shown in the same assembly drawing.